A short summary:
- Workbooks show your issues in an Excel-like view where you can sort, filter and edit your issues like in Excel.
- You can also share them and work together on it with your
- colleagues.
- Every modification you make to your issues in this view, will
- automatically modify your original JIRA issues.
- Workbooks can be created based on projects or your existing JIRA filters.
- Deleting workbooks will NOT delete the issues that it contains.
In details:
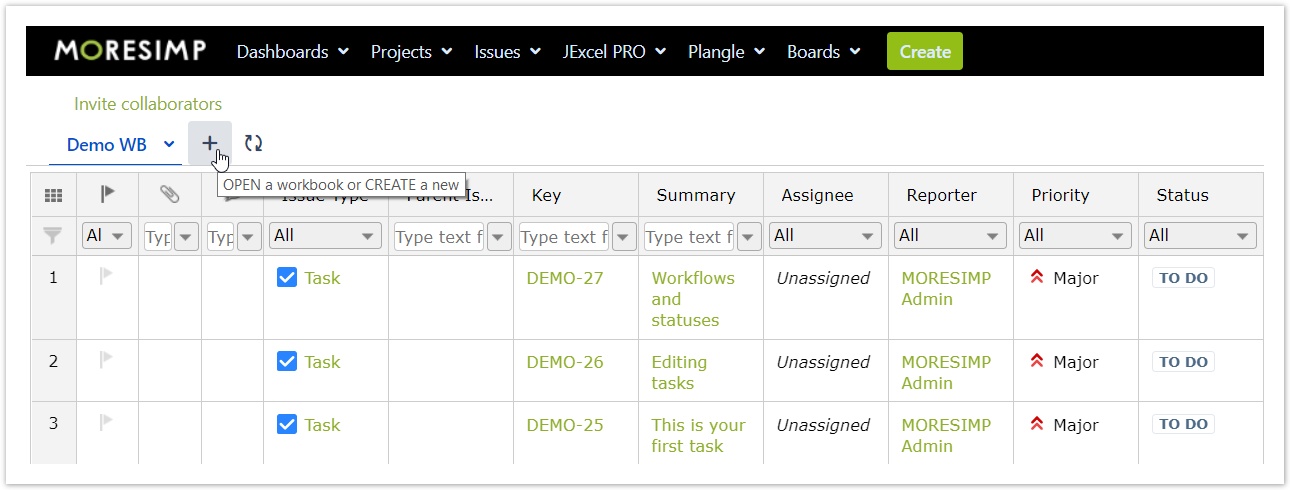
Workbooks in JExcel are like tabs in Excel and provide a filtered view of your issues.
To create a workbook just click on the "+" icon (1).
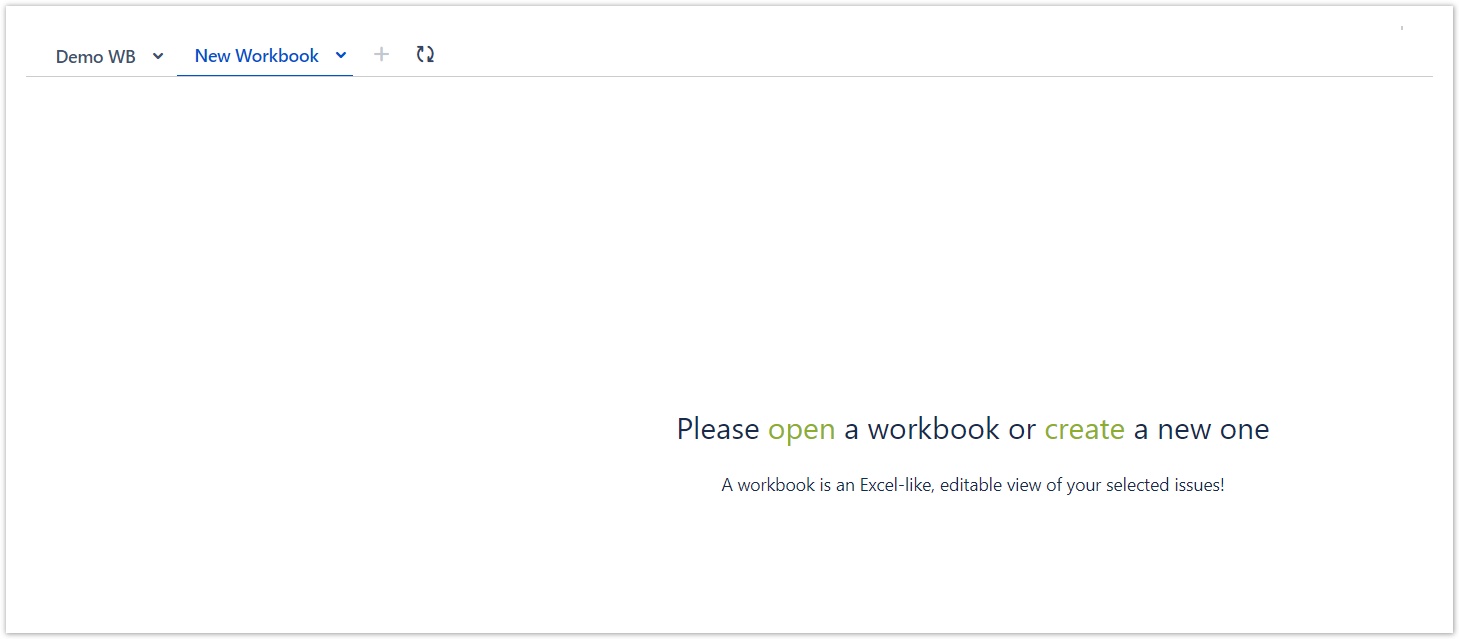
After clicking on the "+" icon you will see this blank page.
On this page, you will have to click on the link "Create" (1).
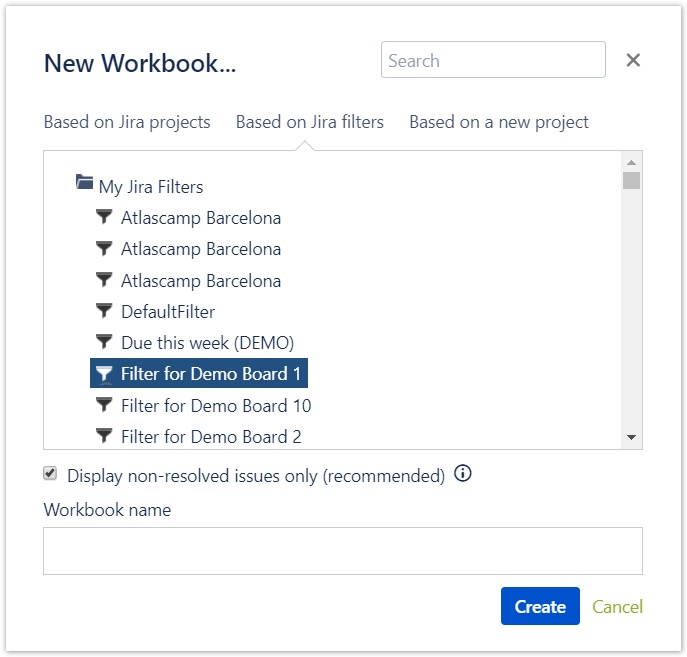
They can be created based on either projects
, already existing JIRA filters
or you can create a new project.
- more projects can be selected when creating a workbook based on projects
- only one JIRA filter can be selected when creating a workbook based on already existing JIRA filters
- The Workbook permissions (the visibility of the workbook) are inherited from its filters.


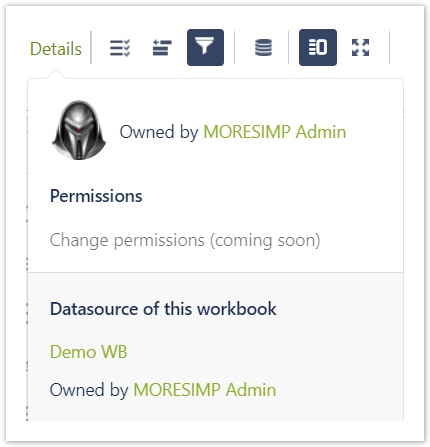
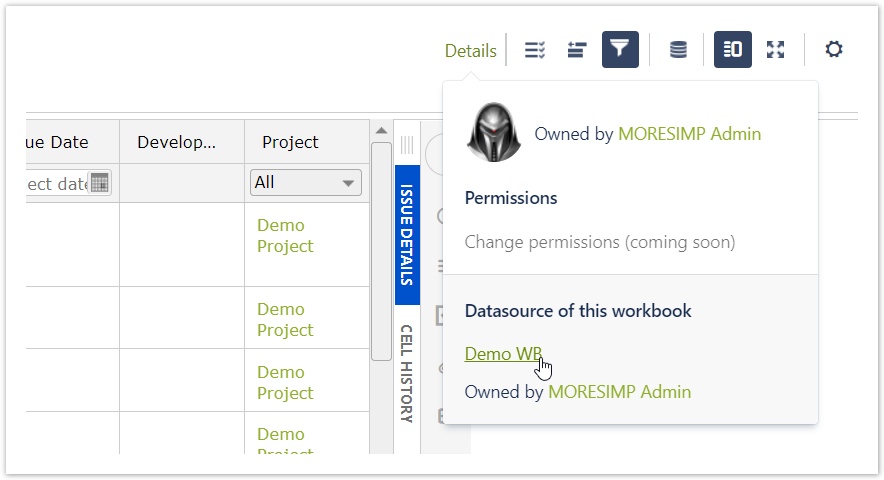
After your workbook is generated, you can always check how it is filtered by clicking on
Details
and clicking on the name of the workbook in the section
Datasource of this workbook
.
It would take you to the Issue Navigator and shows you the filter you are using
.
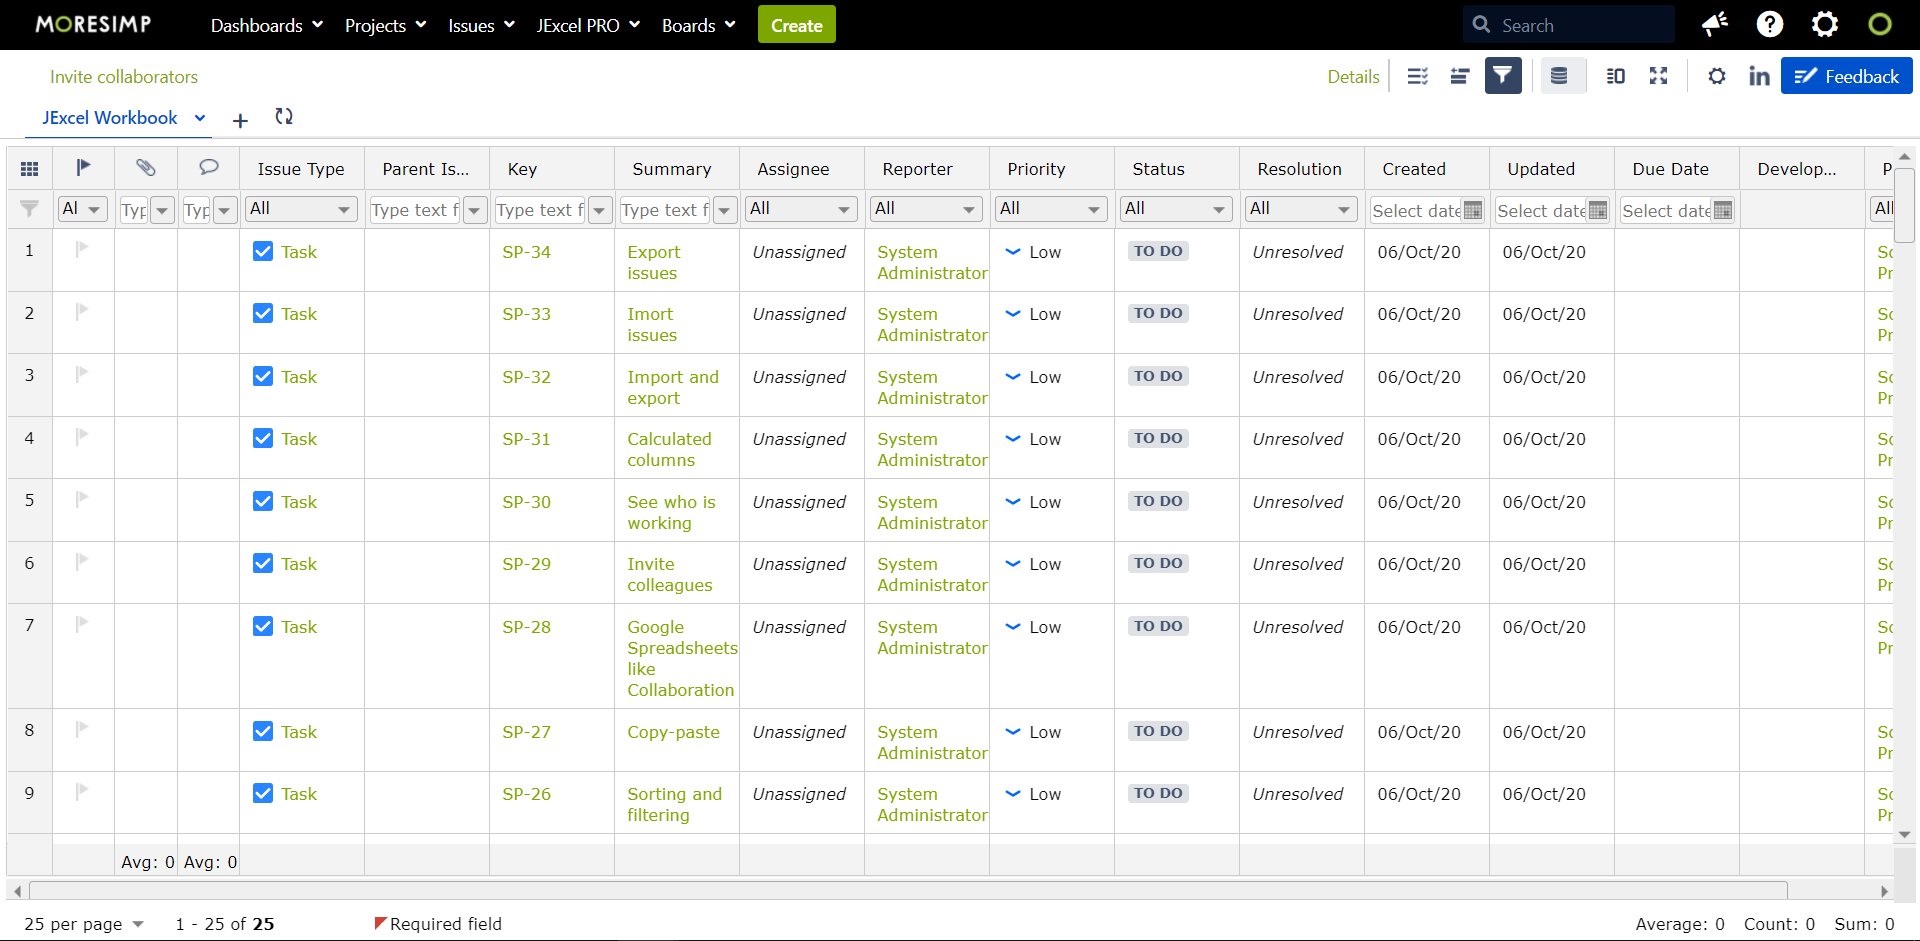
How do workbooks look like In JExcel?
On the top navigation bar you can see
a list of your workbooks
. If you grab the ![]() icon next to the workbook's name you can easily reorder them with drag and drop.
icon next to the workbook's name you can easily reorder them with drag and drop.
You can add new workbooks by clicking on the button
+ at the and of the navigation bar.
You can also open
or create a new
workbook by clicking on the links
on the middle of the screen.
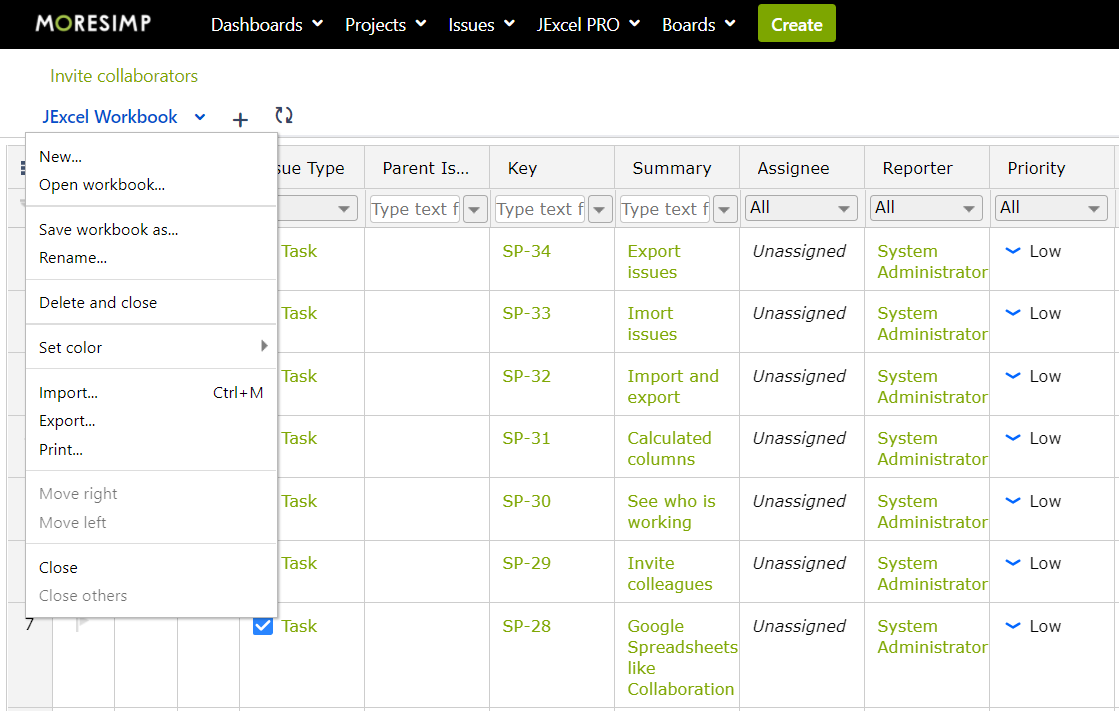
What can you do from the workbook menu?
You can open the menu of each workbook when clicking on the little arrow
after the workbook's name.
From the Workbook menu, you can...
| Option | Description |
|---|---|
| New... | create a new |
| workbook | |
| Open workbook... | open an existing one |
| Save workbook as... | make a copy of a workbook |
| Rename... | rename a workbook |
| Delete and close | delete and close workbooks |
| Set colour | set a |
| colour to a workbook |
| Import... | import issues to the selected workbook |
| Export... | export the selected workbook |
| Print... | print issues from the selected workbooks |
| Move right | move the selected workbook to the right |
| Move left | move the selected workbook to the left |
| Close | close the selected workbook |
| Close others | close other workbooks |
Who is the owner of the workbook? What does it mean?
If you create a workbook, you become the owner of it.
This means that nobody can delete your workbook, only you.
How to see who owns a workbook?
Just click on the button "Details"
and you will see who owns it
.
It is also possible to see what is the filter it is based on
.
And who is the owner of that filter
.